So I open up my thesaurus in search of a word that means failure beginning with a W (for Wednesday) because I can’t wait until Friday to post my new post. There’s nothing! Naught. Zero. Zilch. Bugger all! And then I open up my dictionary to find the meaning of fail: to be unsuccessful in achieving one’s goal. And this has prompted me to question what my goal was. As an RTW Faster my goal is not to buy a single garment of ready to wear clothing for twelve months. I have not failed here. As a sewist my goal is to sew all my clothes for twelve months. So far I have not failed here either. As the perfectionist that I am my goal is to sew neatly and to learn new techniques and just “have a go”. Also haven’t failed there. I think where I have failed is that I’ve let myself wallow (wow, found a W word!!) when a particular garment hasn’t worked out exactly how I’ve imagined it would… and I’ve chosen to keep this to myself and not admit my “errors in judgement” to my audience! Ha! Wow, that feels better already… I might call this “Wallowers Anonymous”. Hi, my name is Carola and I’m a wallower!!
Nah, I’m not really a wallower at all and if I do wallow it would only be for a such a wee while and then I just get on with it again. My problem is that I’m not wanting to admit when things go wrong and I’m not wanting to bore you all with anything slightly negative. I think it’s time to drop down a gear and show you a few of my “failed” garments, give you the reasons why they failed and tell you what I learned from them… and then I’m going to “get on with it again”.
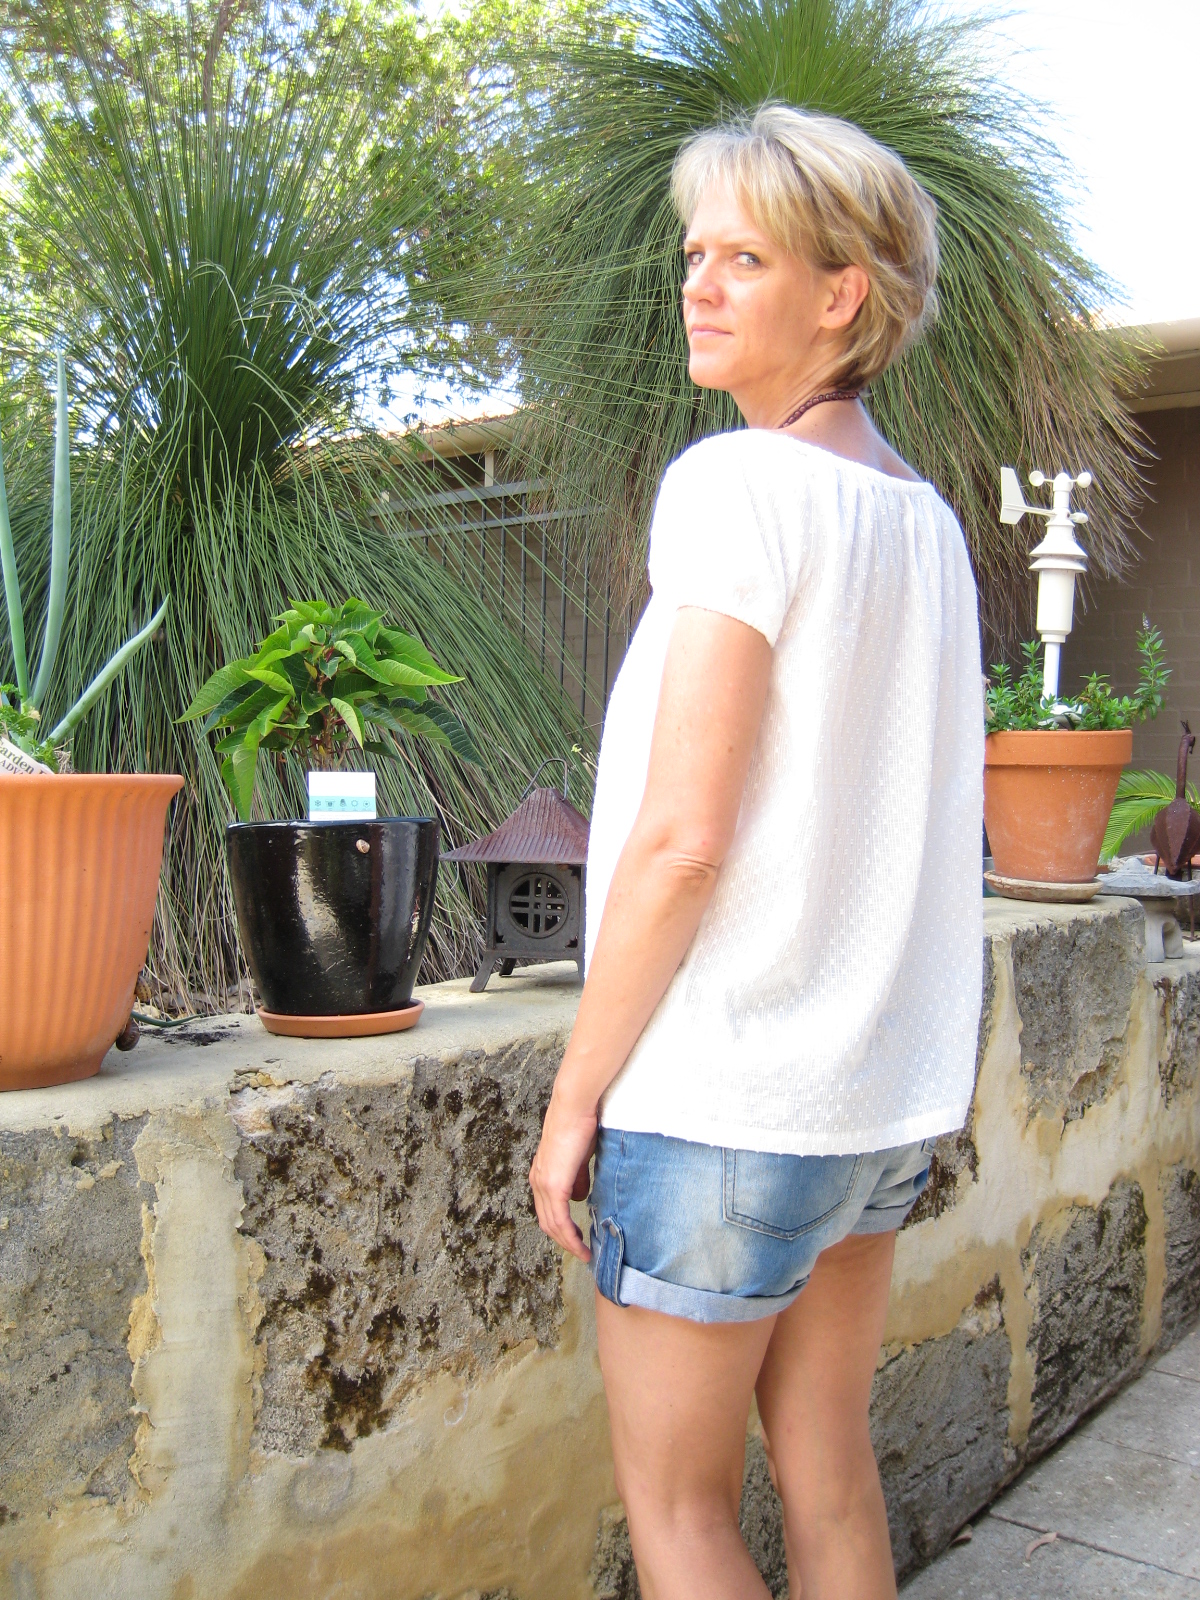
Firstly I made another pair of Thurlow shorts. I wanted denim but here in Perth we have such a limited range of denim and I ended up buying a thin “denim” in the colour I liked but found that after pre-washing it, all the starch came out and the fabric became thinner and limp but I chose to overlook this detail and just soldiered on. I used a gorgeous butterfly fabric for the pocket linings and sewed away happily although at one point I suspected that this fabric was too thin and the seams weren’t going to hold properly and I put it aside for about a week planning to not waste any more time on it and just get on with something else. I ended up finishing these shorts and loving the look BUT the seams did give and the fabric looks like it’s about to tear at the back. Here are the various photos:

Bad fabric choice… and yes, it’s obvious I’ve worn them (and loved them for the one day that I wore them!)

See the fabric stretching apart down the middle as well as at the darts? Grrrr!!

Lovely pocket lining
So I learnt that the fabric I bought is probably better suited as a shirt or a top! And I’m going to say that it wasn’t me that failed but instead it was the fabric! Haha, it makes me feel so much better to blame something else!!
SECOND wallow: A New Look pattern (number 6088) (sorry, couldn’t find a better link besides this eBay listing and maybe by the time you look at the link, it will be gone). The pattern itself is great and the instructions were good. Again, poor fabric choice:

Fits OK but just don’t like it…
I think it’s the fabric that I don’t like, as in the stripes. The shade of blue is a shade that I like but at the end of the day I won’t wear this top because the stripes feel wrong. I guess that it’s also another example of how gathers are sort of lost when you use a busy fabric, not that the stripes are busy but you know what i mean. A plain solid coloured fabric will work better with gathers and rouches.
Last wallow for this Wednesday: Burda Alison bathers. I’m sure you can remember the bikini fabric I used and how much I loved that fabric. Well, I decided to make these one-piece bathers using the same fabric and paid $3 to Burda for a pattern in PDF format. For those of you who think it looks confusing to piece together all the pages to create your pattern, let me reassure you that it’s as easy as pie and you can save yourself a lot of money on patterns by doing it this way. On the down side, what on Earth were Burda staff thinking when they wrote those instructions?????? (Funny enough, I believe, after reading other blogs and reviews, that they have actually rewritten the instructions once already!! Sigh). The instructions are shocking and realistically the pattern itself isn’t the best either. These bathers had a separate crotch piece altogether meaning that you had a seam at the back AND the front of the crotch. Who wants a seam at the front of their crotch?? Well, I changed that and joined the crotch piece to the front and then cut one front out of fabric and another one out of lining so it is now a completely lined front…. and then put the bathers together.

See how I joined the crotch piece on to the front panel? I also added a small amount of width. You can also see how the two pieces that I joined don’t even join exactly and this, to me, is a sign of a poorly drafted pattern… sigh!

The extended front panel and the back panel (both lengthened because I am tall!)

Here you see the fully lined front panel joined to the back panel (hence only ONE seam at the crotch line. :)
There isn’t ANY added elastic in these bathers at all and all the edges are done with slightly smaller bands made out of the same lycra that you stretch out while you are sewing them together so that they act like a sort of elastic. I really don’t have a lot of faith in how long these will stay firm-fitting for.
Anyway, I am nearly finished putting them together and have decided to go with my gut feelings and put these in the OUT pile (don’t bother wasting your time in finishing them, Carola!) as I will NEVER wear them anyway as my husband made a valid point this morning while I was trying them on and adjusting them… check out the photos:

Here I have the excess gathered fabric that needs to be rouched and held together by that band I am holding in my right hand… (and yep, the band is way too long but Burda forgot to include that pattern piece so I made my own and will shorten it once I’m happy!)

And here you can see that IF I pull the side and press in the middle, the bathers look semi OK. Ha ha!
DON’T LET GO THOUGH!! I was going to add a bikini strap to the side of the bust that would go across the middle back but the valid point my husband made was “it takes you so long to get the top of the bust piece flat EVERY time you put them on” and then it dawned on me that these bathers are time wasters and I should let them go! Remove the reusable parts (ie: the bather clasps at the back of the neck) and throw the bathers in the bin!! Out with the old and useless and in with the new!
So there you have it! Sorry the post was so long but I felt like I had to get all this off my chest because the fact that I wasn’t blogging about it was bothering me more than the “failings” themselves. I’ve learnt from the errors and I’m now remotivated to move onto simple, non-busy fabric tops and I will also get onto that skirt block. I’ve also started the Craftsy “Pant Fitting Techniques” online course and look forward to being able to solve all of my pants fitting issues REALLY soon. Has anyone else bought the course? I’m keen to hear real people’s thoughts on it and what about the pattern? To look at the cover of the pattern, it doesn’t excite me but hopefully I will learn heaps and understand how to transfer all my fitting alterations onto ANY pants pattern afterwards! :)
So Wallowing Wednesday becomes Wonderful Wednesday. I hope you all have a wonderful week. More positive sewing posts soon!
Carola x